
Over the past few years, I’ve been gradually tinkering with the ever-expanding world of LoRa hardware, which has become increasingly affordable and accessible to hobbyists. Like many people, my first real exposure came through Meshtastic. While the project itself was impressive, I was initially quite underwhelmed by the lack of adoption in my local area. A mesh network isn’t much of a mesh when you’re the only node.
Fast forward a couple of years and things started to change. A good friend of mine began diving into LoRa networking in a much more serious way. However, instead of Meshtastic, he was enthusiastically championing an alternative project called MeshCore. That was enough to pique my interest again.
First hardware: Heltec V3
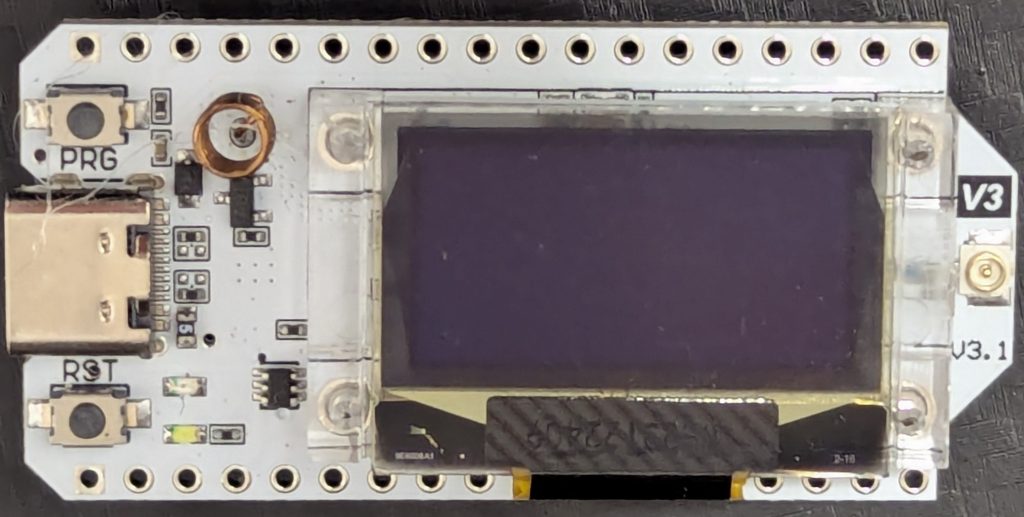
My original hardware of choice was a pair of Heltec V3 devices. These are ESP32-based LoRa development boards that integrate an SX1262 LoRa transceiver, onboard battery charging circuitry, and a small OLED display. The ESP32 provides Wi-Fi and Bluetooth alongside LoRa, making these boards extremely flexible for experimentation and development.
The built-in screen is particularly useful during early testing, allowing you to see node status, signal strength, and message activity without needing a serial console. Combined with USB-C power and a compact form factor, the Heltec V3 boards are ideal for handheld nodes or quick proof-of-concept builds.
That convenience does come at a cost though….. power consumption. Even with aggressive sleep settings, the ESP32 platform is not especially frugal, which becomes important later on.
I dug my Heltec V3 units out of a drawer, reflashed them with MeshCore, and was pleasantly surprised by the results. The network came up quickly, stability was good, and performance was encouraging. Since then, I’ve been casually experimenting and adding nodes locally where possible and trying to push connectivity beyond the unfortunate signal black hole I happen to live in.
The real challenge: power
That experimentation naturally led to the core problem this post is about: expansion.
To grow the network meaningfully, nodes need to be deployed “out in the wild”, anywhere that offers decent elevation and coverage. For these nodes to operate reliably and with minimal intervention, solar power becomes essential.
This is where things got interesting.
After some discussion with my friend, it became clear that while the Heltec boards are great for development, they’re also fairly power hungry. He pointed me toward the nRF52840 modules from Seeed Studio, paired with external LoRa radios.
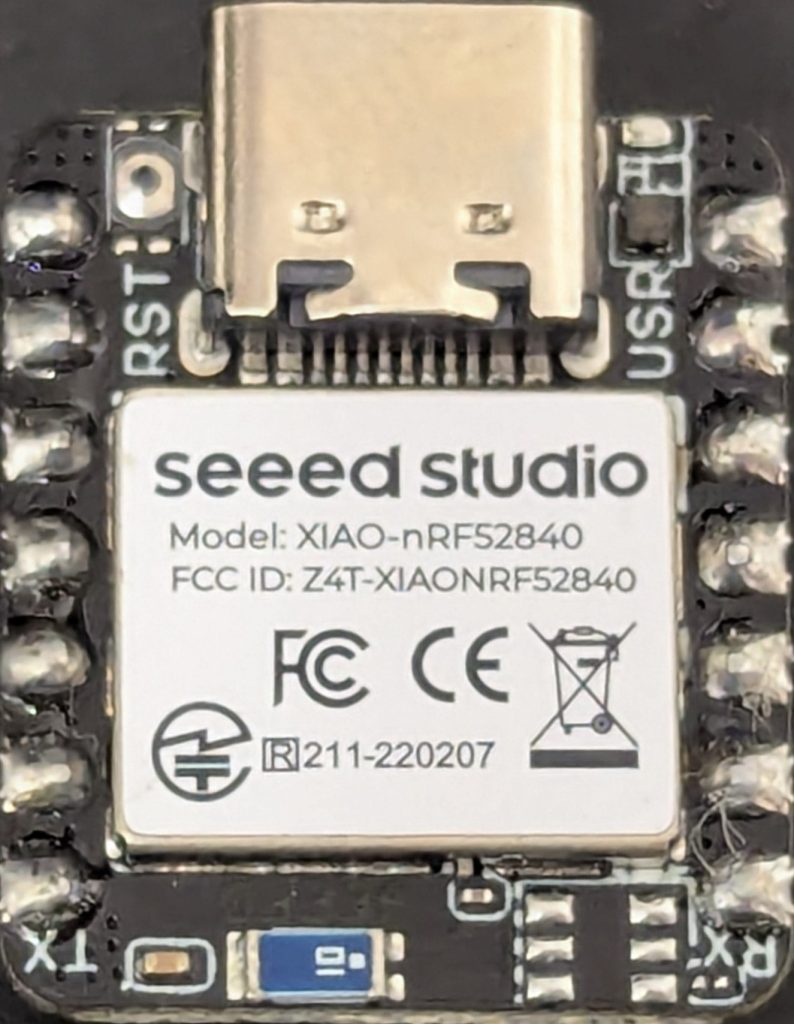
These modules are designed with low-power operation in mind, and the difference compared to the Heltec’s is night and day.
Sleep current drops dramatically, wake times are faster, and overall power efficiency is far better making them much more suitable for permanently deployed, solar-powered nodes.
Solar charging and MPPT
Charging lithium batteries directly from a small solar panel isn’t as simple as it might first appear. Panel voltage varies constantly with light levels, temperature, and load, and without proper regulation you end up wasting a lot of potential energy.
This is where MPPT (Maximum Power Point Tracking) comes in. An MPPT circuit continuously adjusts its input impedance to keep the solar panel operating at its most efficient voltage/current point. For small panels — especially in poor or inconsistent light — this can make a significant difference to how much energy actually ends up in the battery.
In short MPPT allows you to extract the maximum usable power from a solar panel under changing conditions, rather than just hoping for the best.
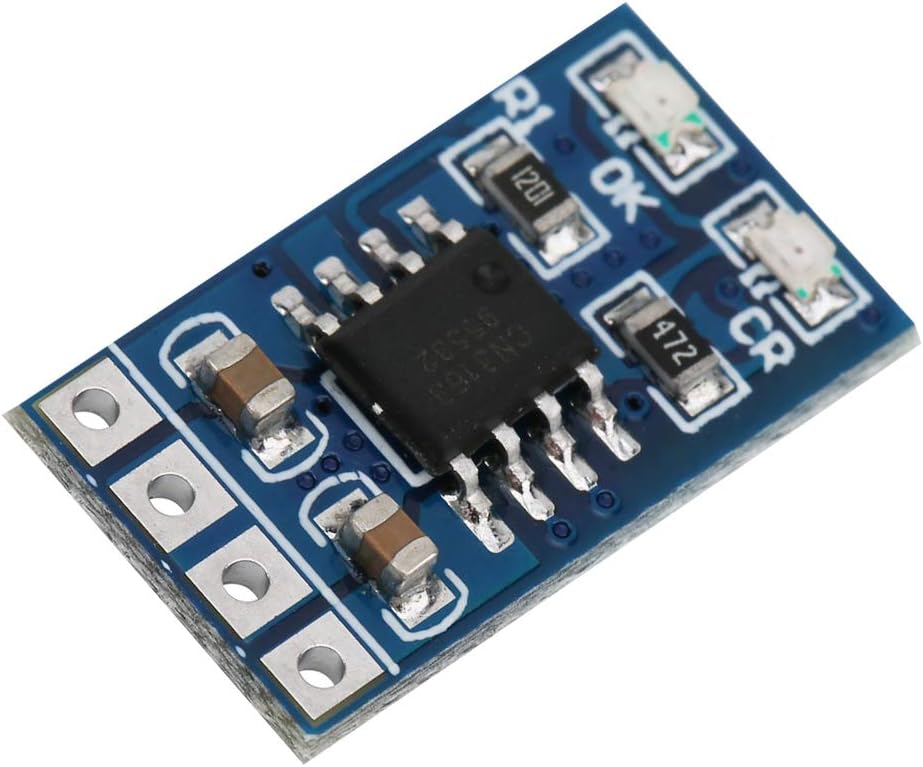
To get started quickly, I picked up a cheap MPPT module from Amazon. It’s a tiny PCB with a very minimal design, essentially a straight implementation from the reference schematic in the datasheet but it works surprisingly well. After testing it, I realised that if I was going to build more than a couple of nodes, paying Amazon prices for these boards wasn’t something I wanted to keep doing.
Rolling my own

I decided to make my own version.
I examined the original board, replicated the layout, and based the circuit design directly on the reference schematic from the datasheet. There’s nothing particularly clever about it just a clean, proven design implemented properly. Once the PCB was finished, I sent it off to JLCPCB for fabrication.
A few weeks later, the boards arrived. I populated one, powered it up, and thankfully everything worked exactly as expected.
The end result is that I can now build these MPPT boards for around 15p each, compared to roughly £5 per board from Amazon. Yes, AliExpress options exist and are cheaper, but they still don’t come close to the cost or the satisfaction of making my own.
Leave a Reply